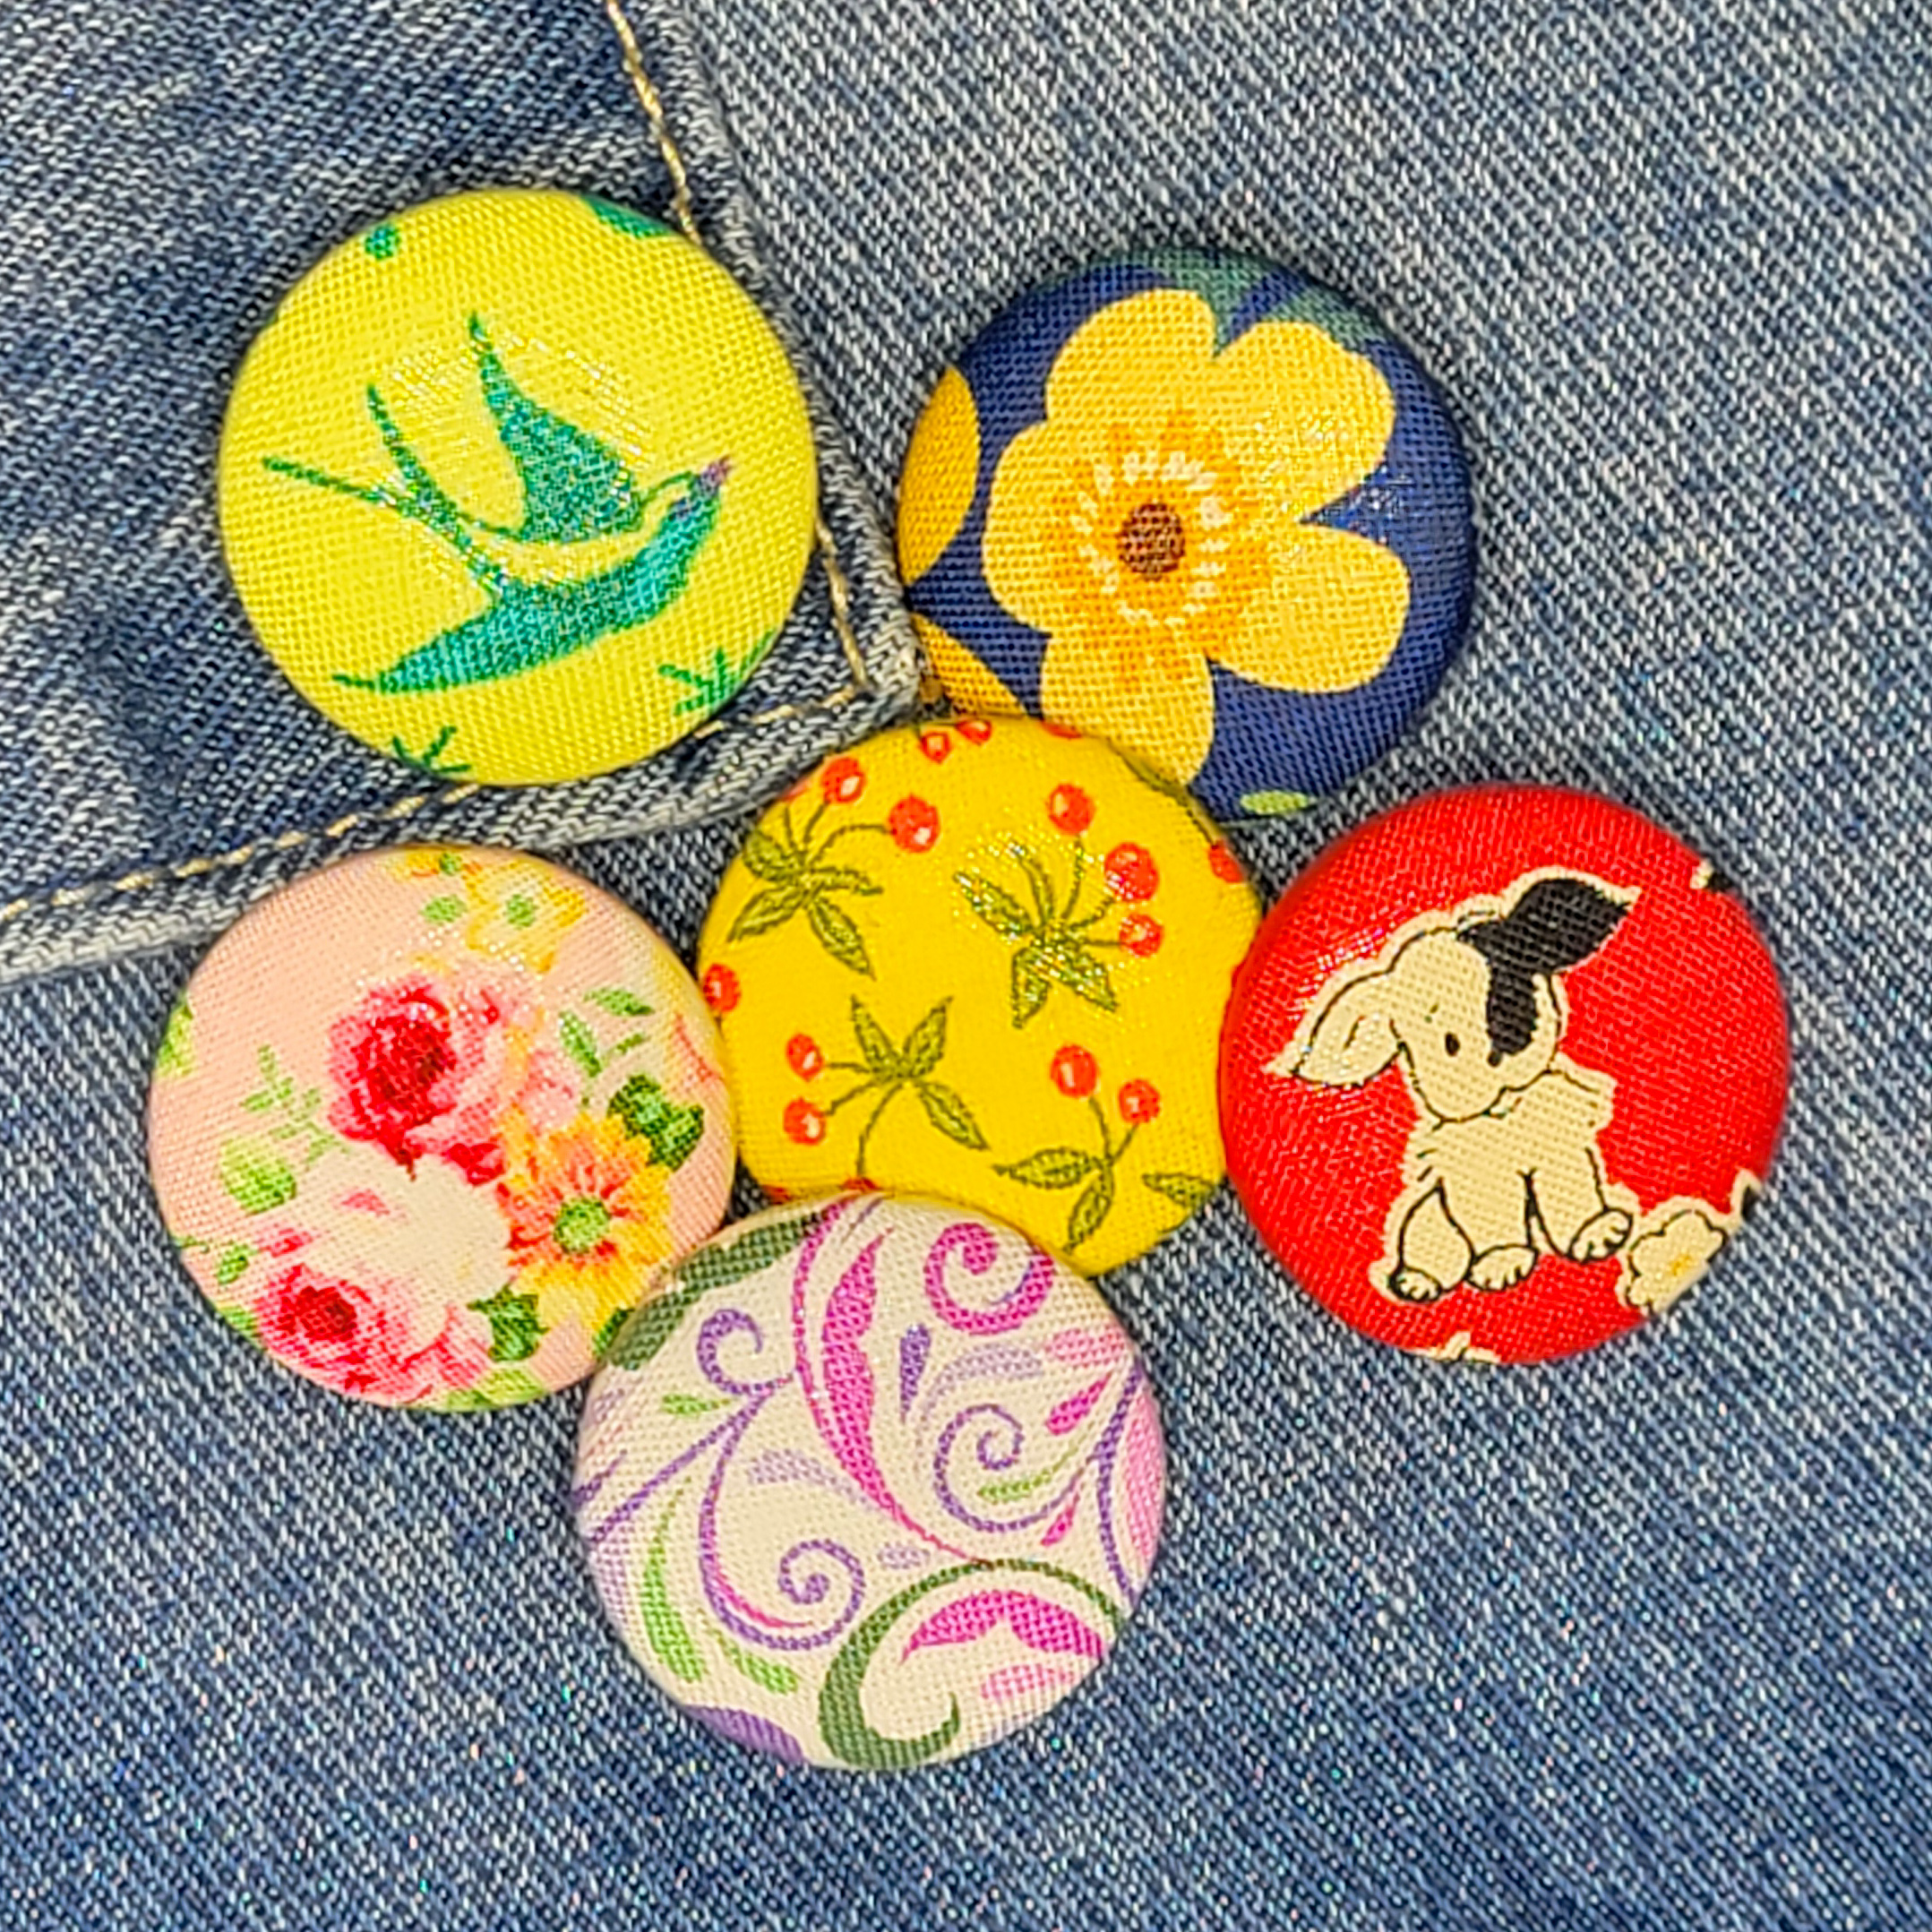
Making fabric covered buttons is like hitting the crafting trifecta – easy, budget-friendly, and surprisingly addictive, lol. Remember those chic styles of 1960s women’s fashion? Guess what’s back in vogue? Yep, we’re smitten with these tiny custom accessories once again! While they used to be the go-to for dresses and coats, we’re giving them a modern makeover, adding whimsy and flair to other sewing projects.
And oh, the possibilities! Besides glamming up garments, they’re downright adorable on bags, shoes, and even pillows {picture them bookending a cushy bolster pillow}. Mix and match them with other decorative elements in your home, like fabric napkins or drapery, for a coordinated look.
My favorite (and quickest) way to make them is by using button kits. You’ll often find two styles for the back of the buttons: some with shanks, others flat. Pro tip: glue a small magnet to the flatbacks, and a nifty magnet! Do you have cute little embroidered or cross-stitched pieces just hanging around? Yeah, turn those bad boys into buttons or magnets. Fabric covered buttons are the perfect way to use those sweet fabric scraps you’ve been hoarding saving.
How to Make Fabric Covered Buttons
This scrap-buster project is so easy and satisfying, it’s impossible to stop at just one! Follow our how-to instructions to make your own, unique fabric covered buttons.

Gather Your Materials and Supplies
- Fabrics (extra points if you use scraps)
- Dritz Craft Button Kit (I used the Dritz 7/8” inch buttons)
- Scissors
- Pen
Step-By-Step Directions

1. Choose a piece of fabric. Take the circular plastic template from the kit and place it onto your fabric. If there is a particular image that you would like centered on the button, but sure to place that image in the very center of the circle.
2. Use the pen to trace the outside circle of the plastic template.
3. Cut out the circle following the line you traced using the template.
4. Find the clear ‘mold’ and one of the button shells (this will be the front of the button).

5. Place the fabric over the front of the shell and hold it firmly while pressing the fabric covered shell all the way down into the mold. You can peek at the front before the shell is all the way in the mold to make sure your fabric is lined up the way you would like. If it’s not right on the front of your button, simply adjust the fabric and place it back in. Now, press the excess fabric edges towards the center of the button shell. I just turn the mold and press the fabric in with my fingers as I turn.
6. Choose which back you want to use – one with a shank (for securing a button) or one that is blank (without a shank).
7. Place the back on top of the button shell and then put the pusher (usually blue) on top of the back with the hollow side down. Now push it down firmly until you hear a click.
8. Remove the pusher and remove your new button by pushing the front of the mold so it pops out.
You have made your own stylized button and now you have to make more!